Headlamp Replacement Guide
Difficulty: Easy
Duration: 15 minutes
How often: When lights dim or burn out
For maximum driving safety, it is very important to keep a close eye on how your car lights are functioning. If a light goes out, follow these steps to replace it and continue driving safely.
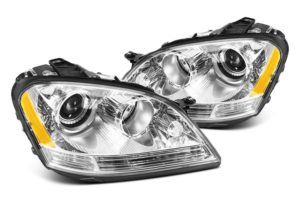
Before replacing it, look in your owner’s manual to identify the type of headlamp your vehicle uses. In general, there are two kinds of headlamps—sealed beam and composite. Sealed beam lights are common in older cars, while composite lights are found in newer models and contain special housing with a removable halogen or xenon bulb.
Things you’ll need from your garage or Southern Industrial Mall:
- Automotive light bulbs
- Cleaning cloths
- Rubber gloves
- Screwdriver set(s)
Sealed Beam Headlamp Replacement
These headlamps come in a 2- or 4-light system and can be round or rectangular.
Step 1
Turn the car lights on to find out which headlamp needs replacing. Once you have located the light, turn your car off completely.
Step 2
Locate and remove the protective bezel (cover) and retaining ring that is screwed in and holds your headlamp securely in place. You may need a Phillips-head screwdriver or a special Torx tool to remove them. Check your owner’s manual for recommendations. If your screws are sticky, spray them with penetrating solvent. Hold the headlamp as you remove the screws to avoid shattering.
Step 3
Pull the wiring connector off the prongs on the back of the light. Clean the connector socket with electric contact cleaner and inspect its wires for wear.
Step 4
Push the prongs onto the new headlamp and place it back into place. Make sure that the headlamp is right side up.
Step 5
Replace the retaining ring and protective bezel.
Composite Headlamp Replacement
Step 1
Turn the car lights on to find out which headlamp needs replacing. Once you have located the light, turn your car off completely.
Step 2
Locate the wiring harness attached to the back of the headlamp and remove it. Review your owner’s manual for additional assistance.
Step 3
Remove the bulb retainer by gently twisting and pulling it back.
Step 4
Pull the bulb straight out. Only handle the base of the bulb.
Step 5
Use a clean rag or wire brush to remove any corrosion in the connection area.
Step 6
Attach the new bulb and make sure the tabs are lining up properly. Reattach the retainer and confirm everything is locked in place.
Step 7
Reattach the wiring harness and test your headlamp to make sure it is working properly. If the light does not come on, double-check the wiring harness to ensure that it’s fully seated.
Taillight Replacement
Step 1
Turn the car lights on to find out which taillight needs replacing. Once you have located the light, turn your car off completely.
Step 2
Check your owner’s manual to determine whether the lens can be accessed from the outside (screws will be visible) or the inside (remove the plastic cover to get to the bulb).
Step 3
Remove the bulb by gently twisting and pulling it back.
Step 4
Use a clean rag or wire brush to remove any corrosion in the connection area.
Step 5
Attach the new bulb by gently pushing in and turning it at the same time. Make sure the tabs are lining up properly.
Step 6
Replace the lens or plastic cover and test the bulb to make sure it is working. Have someone watch the bulb as you step on the brakes and turn on the lights. If there is no illumination, this may be a wiring or electrical problem and you should contact your local auto mechanic for assistance.
Important Tips
- Do not confuse the retaining screws with the headlamp’s aiming screws. The aiming screws ensure proper headlamp movement and beam adjustment.
- Use gloves when handling the new light to prevent oils from your hands potentially affecting the life of your new bulb.
- Bring your old headlamp into your local auto parts store to ensure the exact replacement.